
deploying_on_hyper-v
This is an old revision of the document!
Deploying_on_Hyper-V
- Downloaded the correct file and extracted the .zip file on your computer.
- Launch your Hyper-V manager
- Select ‘Action’ from the menu and choose, ‘import Virtual Machine’.<br />
 <br /><br />
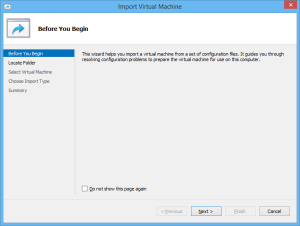
 - Press Next on the first screen.<br />
 <br /><br />
 - Specify the E.F.A.3 folder you extracted from the .zip file.<br />
 <br /><br />
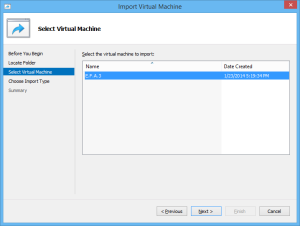
 - Select the E.F.A.3 virtual machine to import.<br />
 <br /><br />
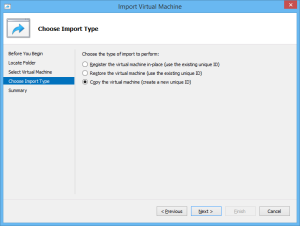
 - Select ‘Copy the virtual machine(create a new unique ID)’ and press Next.<br />
 <br /><br />
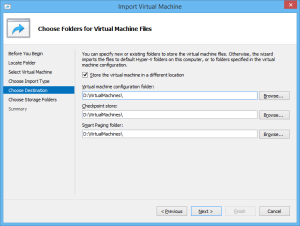
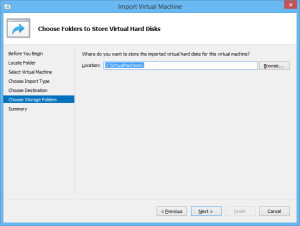
 - Store the virtual machine on your proffered location (in the example image D:\VirtualMachines) <br />
 <br /><br />
 - Store the disk on your preferred location (in the example image: D:\VirtualMachines) <br />
 <br /><br />
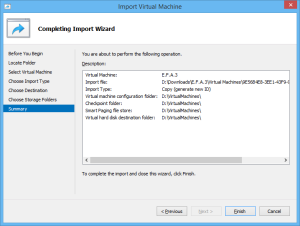
 - Click finish at the final menu <br />
 <br /><br />
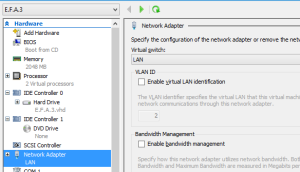
 - When the image is imported make sure you go into settings and check that your network adapter is set correctly: <br />


further reading
deploying_on_hyper-v.1458490497.txt.gz · Last modified: 2016/03/20 16:14 by 0.0.0.0